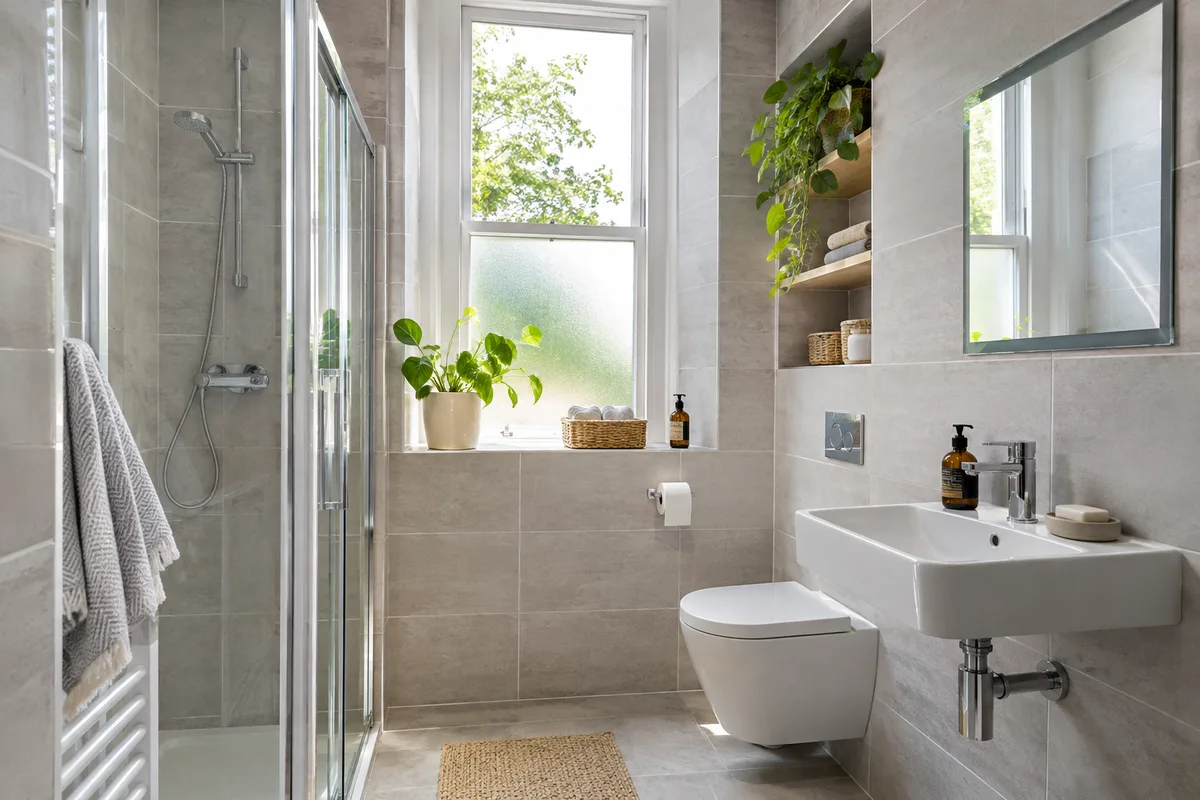
Tiles do more to change how a small bathroom feels than almost anything else you buy. The right size, direction and grout can make a tenement room look wider and taller, and the wrong choice can chop it into pieces. This guide gives you clear rules, and says where to break them.
Do large tiles really make a small room look bigger
Mostly, yes. Large tiles mean fewer grout lines, and fewer lines mean fewer visual breaks. The eye travels across the wall without stopping, so the room looks calmer and bigger. A pale, large format tile in a matching colour on the walls and floor is one of the most reliable tricks in a small bathroom.
There are limits. Very large tiles are heavy and hard to cut around pipes, window reveals and uneven walls. In an old tenement, where walls are rarely flat, a big tile can show every dip. A medium tile is often a better fit than the biggest one in the shop. Ask how the walls will be prepared first, because the tile can only look as good as the wall beneath it. Our guide to decorating a small bathroom shows how to bring colour and light together.
Laying direction: horizontal, vertical and herringbone
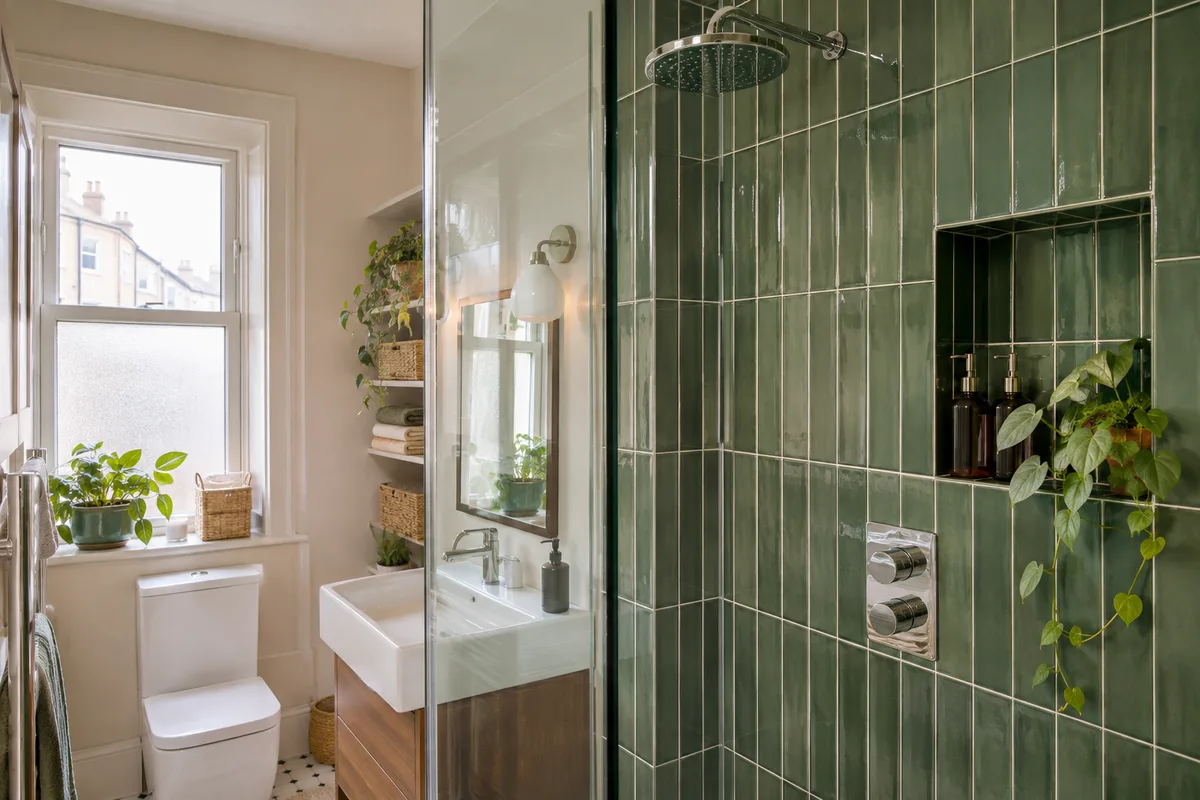
Direction changes how the room looks. Laid horizontally, tiles stretch the eye along the wall and make a narrow room feel wider. Laid vertically, they draw the eye up, which can help a room with a good ceiling height. Most tenement bathrooms are tall and narrow, so vertical tiles in the shower are a neat way to show off the height.
Herringbone is a busier pattern. It works well on a small floor and can be a lovely feature, but it uses more tile, takes longer to fit and needs careful setting out. Keep it to one surface. A simple brick bond or stacked layout is easier to fit and clean. If you are not sure, put some tiles on the floor or lean them against the wall to see the effect before you buy a full order.
Grout colour and joint width
Grout is the part most people forget. A grout that matches the tile fades into the background, so the surface looks like one piece. A strongly contrasting grout draws a grid across the wall, which makes the room look smaller and busier. In a small room, matching or very close colours are the safe choice.
Choose narrow joints where the tile edges are accurate. The fewer wide lines, the less there is to clean. In older flats, walls are rarely square, so a slightly wider joint can hide small errors, and your tiler will advise. Use a good quality grout and seal it if the maker recommends it, and use flexible sealant in the corners and around the tray. Our guide to damp and mould in a small bathroom explains why those joints matter.
Full height or half height on the walls
Tiling to the ceiling in the shower and to a lower line elsewhere is common. A half height tile with paint above can look warm and period-friendly, but the line can cut the room in two. Where the line falls matters. Put it at a natural height, such as the top of the window sill or the top of a niche, not in an odd place.
For a small room, full height tiling gives the cleanest result and the easiest wipe-down. In a tenement, the high ceiling may mean that full height is a lot of tile, so consider tiling all of the wet wall and part of the others. Wall panels are another way to cover a lot of area with few joins, and our guide to wall panels or tiles in a tenement compares them. If you already have tiles you want to keep, see fitting wall panels over existing tiles.
Floor tiles on an older timber floor
Most older bathrooms have a timber floor, and it moves. Tiles do not, so a tiled floor on bare boards can crack. The usual answer is to prepare the floor with a suitable board or underlay and a flexible adhesive, and to make sure the structure is sound first. Do not tile over damp or soft boards.
Choose a floor tile with some grip, because bathroom floors get wet. A matt finish is safer than a polished one. Check that the finished height will not make the door stick or leave a step at the threshold. Our guide to bathroom flooring in older flats covers other options such as vinyl, and our page on replacing a tenement bathroom floor explains what happens underneath.
One feature wall, not four
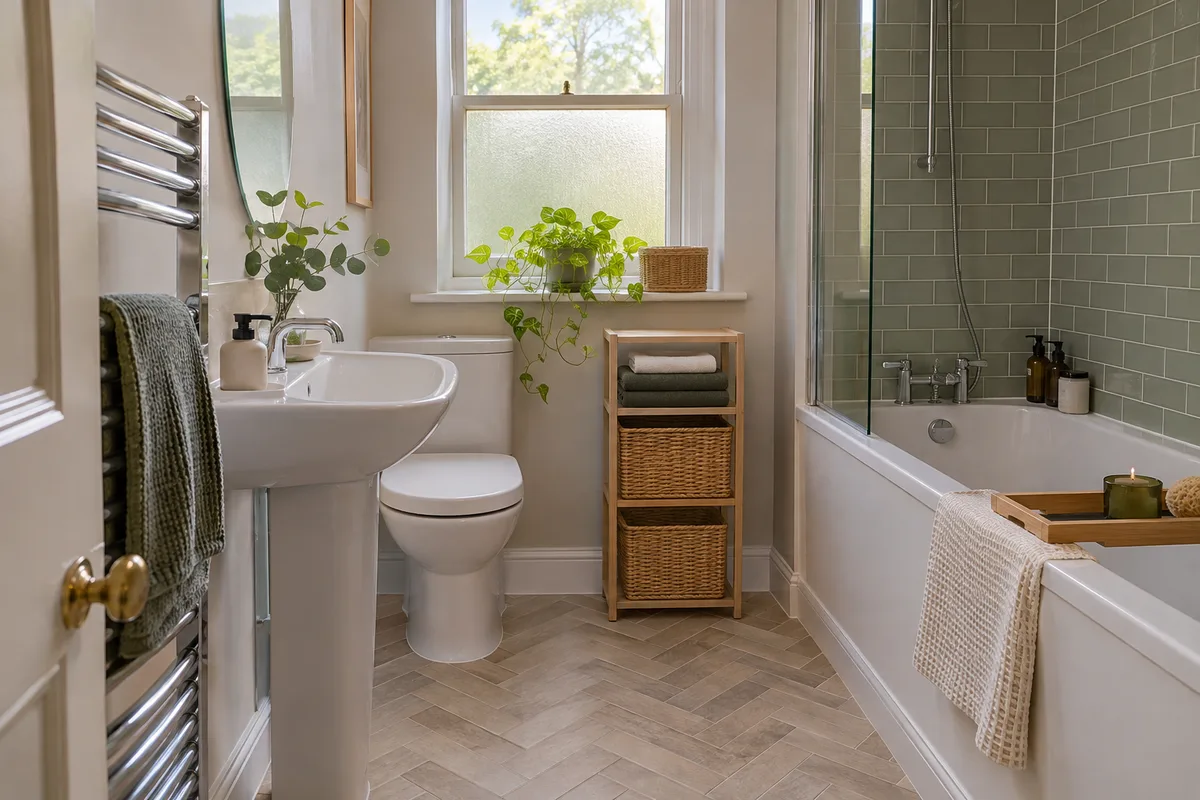
A pattern or strong colour is fine in a small room, if you limit it. One feature wall, such as the shower wall or the wall behind the basin, gives a focal point without closing the room in. If all four walls compete, the room feels smaller and the eye has nowhere to rest.
Pick the wall you see as you walk in, or the one the toilet and basin face. Keep the other surfaces calm and plain. A green or blue tile in the shower, with light neutral walls and floor, is a good example. A patterned floor can be your single feature too. For colours and finishes that suit your home, browse our bathroom styles.
Planning cuts around windows, pipes and niches
Good tiling is mostly planning. Before the first tile goes up, your tiler should set out the wall, so that cuts are balanced on both sides and you do not end up with a thin sliver at a corner. Tiles should line up with the window, the niche and the tray.
Decide where the pipes, valves, niche and shelf will go before tiling starts, because moving them afterwards is messy. A recessed niche saves floor space for bottles. Ask for the set-out to be agreed with you, and see it marked on the wall if you can. Small details, such as trim and edge strips, finish the job neatly. If you would like help planning a tiled bathroom, call us or ask for a free quote. Our guide to high ceiling tenement bathrooms has more on tall walls.
Guidance reviewed 14 November 2026. Technical and permission requirements depend on the property and proposed work; relevant guidance is linked in the article.